How to Choose the Right Bolt and Screw for Your Project
Choosing the right Bolt Screw begins with the joint, not the hardware display. A shiny head can look convincing and still be wrong for the job. Consider the materials, expected load, vibration, moisture, and access for installation. A screw joining plywood needs different features from a bolt clamping two steel plates. Small details matter: thread type, diameter, length, head shape, and whether a washer or locking method is needed. Fit matters, too.
Fastener engineer Richard T. Barrett’s NASA Fastener Design Manual offers a useful guiding principle: “The purpose of a fastener is to hold two or more parts together.” That simple idea points toward a larger question: how will the whole joint behave? The sections ahead compare bolts and screws, explain common materials and drive types, and show how to match fasteners to different project conditions. They also cover measuring length, checking thread compatibility, and avoiding common installation mistakes. Hand-tightening may feel reassuring. It is not a substitute for the correct specification.
Real projects are rarely perfect. A pilot hole may be slightly off, or the available screw may be longer than expected. Pause and check the fit rather than forcing the fastener. For safety-critical assemblies, use the manufacturer’s instructions and appropriate engineering guidance. A careful choice may take another minute. That minute can prevent a loose joint, damaged material, or a frustrating repair later.
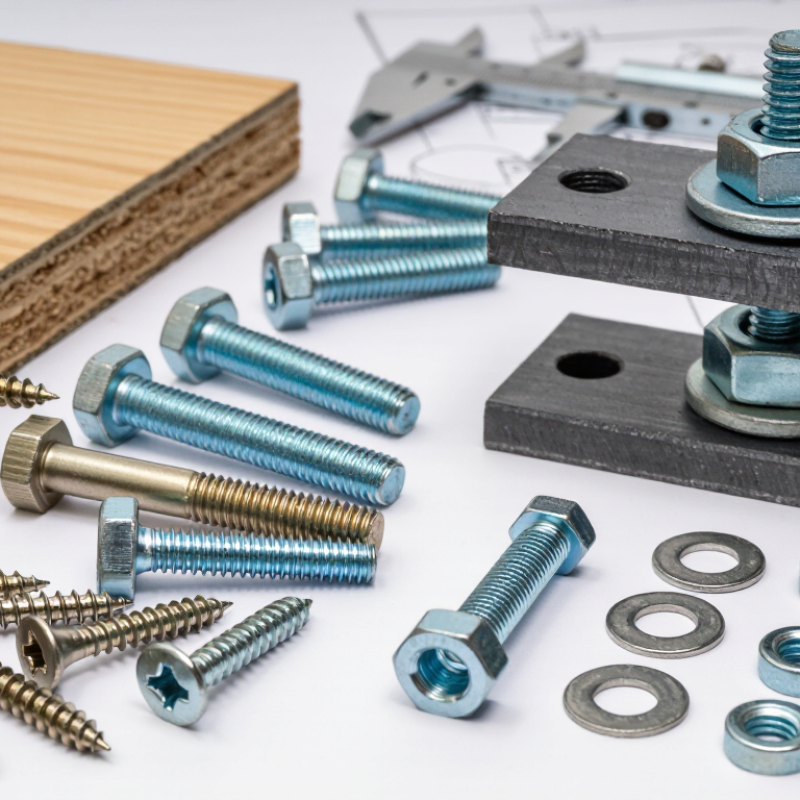
Identify the Joint, Materials, and Loads Your Fastener Must Handle
How to Choose the Right Bolt and Screw for Your Project
Start with the joint. Will it be clamped, carry shear, or face vibration? A cabinet hinge, steel bracket, and machine cover may need different fasteners, even when their holes match. In wood-to-steel joints, consider thread engagement and crushing. With aluminum, account for softer threads and material compatibility. Sketch the load path. Note tension, shear, vibration, tool access, and whether the joint must come apart. Small details change the choice.
The numbers matter. NASA’s Fastener Design Manual, NASA RP-1228, advises preload near 75% of proof load for reusable fasteners. Treat that as guidance, not a universal torque setting; coatings, lubrication, and installation variation affect clamp force. For structural steel, the RCSC 2020 Specification lists 28 kips as the minimum pretension for a 3/4-inch Group A bolt. That value applies to its defined structural joint, not every bracket. Match fastener strength and material to the load, then check edge distance, bearing, corrosion, and temperature. The strongest bolt can damage a softer mating part—an easy assumption to miss. For a critical joint, test an assembly and record the grade, coating, and tightening method.
Understand How Bolts and Screws Differ in Design and Use
A bolt and a screw can look almost identical, but their threads and intended connections differ. A bolt usually passes through aligned holes and is tightened with a nut. A screw typically forms or enters threads in the material itself, such as wood, plastic, or a tapped metal hole. The distinction is useful, though not absolute: terminology can vary, and some bolts thread directly into a component. That distinction matters.
Start with the joint, not the name on a parts list. For a steel bracket joined through two drilled plates, a bolt and nut can clamp the plates together firmly. For a shelf bracket going into a wooden stud, a wood screw is usually more suitable. Its tapered point and coarse threads grip the wood. In thin sheet metal, a suitable machine screw may need a matching threaded hole or nut. Check the material thickness and expected load before choosing.
Head shape affects access and tools. A countersunk screw sits nearly flush; a hex-head bolt is easier to turn with a wrench when there is room. Match the fastener material to its environment, especially outdoors, where moisture can accelerate corrosion. Use the correct pilot-hole size for screws, and avoid overtightening: crushed wood fibers or stripped threads can weaken a connection. I still pause over fastener names sometimes. The actual joint tells you more than the label.
Select a Fastener Material and Finish for the Environment
A fastener can look perfect on a workbench and still fail outdoors. Match its material and finish to moisture, chemicals, temperature, and contact with other metals. Stainless steel resists many wet conditions, but its grade matters near salt spray or pool chemicals. For a dry indoor cabinet, plain steel may be adequate and more economical. In damp locations, a protective coating can help, though scratches may expose the steel beneath.
Think about what the bolt or screw will touch. Dissimilar metals can corrode where they meet, especially when water is present. A stainless screw driven into aluminum, for example, may need a compatible barrier or fastening system. Check the fastener maker’s technical data for corrosion guidance and load limits. Finish names alone do not guarantee equal protection.
I learned that the hard way: a coated screw looked fine, but a chipped head rusted after repeated rain. Small details matter.
Tips
Wipe the surface, inspect nearby materials, and consider how often the joint gets wet. For a coastal deck, choose a corrosion-resistant grade suited to marine exposure, then test one fastener in a hidden spot. Keep the joint dry when possible. If the environment is uncertain, ask a qualified supplier and verify the specification before buying. A little extra checking now can prevent seized screws later.
Match Fastener Size, Thread, Head, and Drive to the Project
Match the fastener to the materials and the loads it must carry. Measure the clamped stack, then choose a length that leaves adequate thread engagement without bottoming out. Check nominal diameter and thread pitch against the receiving hole; coarse threads suit many general assemblies, while fine threads allow smaller adjustments but need careful alignment. For steel bolts, ISO 898-1 defines property classes: class 8.8 indicates a nominal tensile strength of 800 MPa and a nominal yield ratio of 0.8. Actual proof loads depend on diameter, so check the standard’s table rather than relying on the class marking alone. Check the actual fit.
Head shape and drive affect access and installation. A hex head works well where a wrench can swing; a socket head may fit a narrow recess. Match the drive to the tool and available clearance, and make sure the bit seats fully before tightening. NASA’s Fastener Design Manual, Reference Publication 1228, explains why tightening torque is an imperfect measure of bolt preload: friction at the threads and bearing surface changes the result. Use torque values specified for the fastener and joint conditions, including lubrication. One detail is easy to miss: a screw that looks long enough can bottom out before the parts clamp together. A trial assembly helps catch that, though drawings and real parts do not always agree.
How to Choose the Right Bolt and Screw for Your Project
Match the fastener’s size, thread, head, and drive to the materials, load, and available tool access. This chart compares the tensile stress area of common coarse-thread metric bolt sizes.
A larger tensile stress area generally allows a bolt to carry more tensile load, but it is not an allowable-load rating. Actual capacity depends on the bolt’s property class, material, joint design, and installation. Choose thread pitch and head/drive style to suit the mating part and tool access.
Metric coarse-thread tensile stress areas are nominal reference values based on ISO metric thread dimensions.
Check Installation Methods and Confirm the Fastener’s Fit
A fastener can look right on the bench and still fail during installation. Check how it will be fitted before choosing one. A bolt usually needs a nut or a threaded hole, while a screw may cut or engage threads directly in the material. Confirm you can reach the head with the required tool; a tight corner may leave no room for a wrench. For wood, drill a pilot hole when the material or screw size calls for one. For metal, match the thread to the tapped hole or nut. Small details matter.
Then verify the fit. Measure the material stack, including any washer, and choose a length that provides adequate thread engagement without protruding into moving parts. Check diameter and thread pitch against the receiving hole. Start the fastener by hand. It should turn smoothly. If it binds, stop; forcing it can damage the threads or split the material. I still recheck measurements, especially when replacing an old fastener, because the original may not have been the right size. Use the specified tightening method where available, and avoid guessing at torque. Consider corrosion exposure and contact between dissimilar metals, too. A neat-looking fit is not always a safe one.

