How to Choose the Best LED Light Kit in 2026?

Choosing an LED light kit in 2026 is less about picking the brightest box and more about matching light to a real task. A desk setup needs comfortable, even illumination. A video corner may need adjustable color temperature and smooth dimming. For product photography, accurate color matters more than dramatic brightness. Small differences show up quickly: a skin tone can look washed out, or a white wall can turn blue.

Lighting designer and educator James R. Benya’s work points to a useful principle: “Choose light for the task, then check it in the room.” This is a practical summary, not a verified word-for-word quotation. It matters because a kit’s specifications cannot fully predict how it will look on your desk, backdrop, or workbench. Check the lumen output, color-rendering rating, color-temperature range, dimming controls, and included power supply. Consider the stand, diffuser, cable length, and mounting options, too.

The numbers can mislead. A high lumen rating may sound impressive, yet harsh glare can make a small room unpleasant. Two kits with similar specifications may produce noticeably different skin tones. Reviews and product claims help, but neither replaces a careful fit check. This guide compares the details that affect everyday use, including setup time, flexibility, heat, and long-term value. Some trade-offs remain; there is no perfect kit for every room or budget. That is worth admitting before you buy.
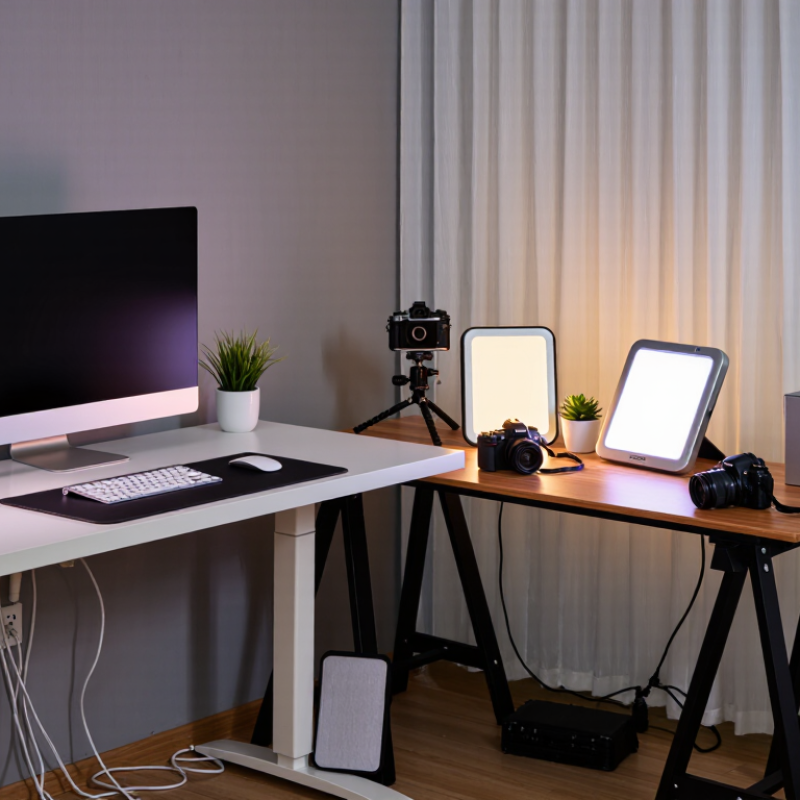
How to Choose the Best LED Light Kit in 2026?

Define Your Lighting Goals and Installation Requirements

Before comparing LED light kits, define what the light needs to do. A reading area needs even, comfortable illumination; a workshop may need brighter coverage over a bench. Note the size of the space, working distance, and whether you need a focused beam or broad spread. Color temperature matters, too: warmer light can feel calmer, while cooler light can make small details easier to distinguish. Brighter is not always better.

Check the installation conditions before buying. Measure the available space, confirm the kit’s voltage and connector type, and look for suitable protection if the lights may encounter dust or moisture. Consider cable length, mounting points, dimmer compatibility, and room for heat to escape. Small details matter. A connector that almost fits is still a mismatch.

Sketch the light positions and trace where the wires would run. That simple check can reveal blocked mounting surfaces or an awkward power route. Review the kit’s instructions and compatibility specifications, and ask a qualified installer if the wiring or power requirements are unclear. I’d also leave a little flexibility in the plan; measurements can be imperfect, and real spaces often surprise you.

Compare LED Kit Types, Components, and Intended Uses

Choosing the best LED light kit means matching its form to the job. Retrofit bulb kits suit existing fixtures, while integrated panels spread light across workbenches or kitchens. Linear strips fit shelves and coves; portable panel kits help with close-up photography. In a small room, a wide beam often feels softer than one bright point. Check the actual mounting space before ordering.

Look beyond wattage. Compare lumens for brightness, color temperature for warmth, and CRI for how accurately colors appear. A kitchen counter may benefit from neutral-white light and high color rendering; a bedroom may feel calmer with warmer light and dimming. Check that the driver works with your dimmer, and inspect heat sinks, cables, clips, and mounting hardware. Small parts matter. A missing bracket can spoil an otherwise good kit.

The U.S. Department of Energy’s 2020 U.S. Lighting Market Characterization estimated that LEDs represented about 48% of installed lighting stock in the United States. That adoption is useful context, not proof that every kit suits every space. Ratings also cannot show glare on a glossy tabletop or uneven light across a desk. Measure first, and treat very broad claims cautiously. I’d still test the layout before fixing everything in place.

Evaluate Brightness, Color Quality, Efficiency, and Lifespan

When choosing an LED light kit, match brightness to the space and task rather than chasing the highest lumen figure. A small tabletop setup may need less output than a full-room scene. Check whether the kit lists brightness for the whole fixture or each light. Numbers need context. Beam angle matters, too: a narrow beam can create bright spots, while a wider one may soften shadows. Check the shadows.

Color quality affects how people, fabrics, and food appear on camera. Look for a high CRI or TLCI rating, then check whether the kit offers adjustable color temperature. A daylight setting can look crisp near a window, while a warmer setting may suit evening interiors. If possible, test a familiar object under the lights and compare it with natural light. Ratings help, but they do not capture every skin tone or room surface. I still find this easy to underestimate.

For efficiency, compare lumens per watt and consider how much power the kit draws during longer sessions. Heat is a useful real-world clue: a hot light can be uncomfortable in a small room, even if its efficiency looks good on paper. Lifespan ratings are estimates, often based on controlled conditions. Check the stated operating hours, cooling design, and whether brightness may gradually decline. A slightly imperfect spec sheet is not a deal-breaker, but unclear testing details deserve a closer look.

Check Compatibility, Controls, Safety, and Installation Needs

How to Choose the Best LED Light Kit in 2026?

Start with fit, not appearance. Check the kit’s voltage, connector type, dimensions, and intended use. A connector that looks close may still be wired differently. Confirm that the power supply matches the kit, and that the driver or dimmer supports LED loads. If you are replacing an existing fixture, measure the available space and check where cables must reach.

Controls matter. Decide whether you need dimming, a remote, or simple on-off operation, then verify compatibility before buying. The U.S. Department of Energy reports that LED products use at least 75% less energy and can last up to 25 times longer than incandescent lighting. Those benefits depend on a suitable setup. A mismatched dimmer can cause flicker or uneven brightness. Small details count.

Check safety ratings for the installation location, especially near moisture or heat. Inspect cable insulation, connectors, and strain relief, and follow the manufacturer’s installation instructions. Switch off power before handling wiring; hire a qualified professional if the connections are unclear. Leave room for airflow around the driver. In practice, even careful buyers can overlook cable length. I would measure twice. It saves rework.

How to Choose the Best LED Light Kit in 2026? — Check Compatibility, Controls, Safety, and Installation Needs

Selection factor What to check How to choose
Intended use Decide whether the kit is for accent lighting, task lighting, display cases, a desk, or an outdoor area. For reading or work surfaces, prioritize suitable brightness and even light distribution. For decorative accents, color options and scene controls may matter more.
Power and voltage Check the light kit’s rated voltage and total power requirement, including any additional strips or modules. Use a power supply with the voltage specified by the kit. Its rated output must meet or exceed the total load; allow extra capacity when recommended by the manufacturer.
Physical compatibility Measure the installation area and check strip width, length, connector type, and available mounting space. Confirm that the kit can be cut or extended where needed. Cut only at marked cut points, and use compatible connectors for the strip type and width.
Light output and color Compare brightness, color temperature, and color-rendering information where provided. Warm white is commonly chosen for a relaxed atmosphere; neutral or cool white is often used where a clearer, more task-focused appearance is desired. Check the product’s stated output for the area.
Control options Check whether the kit uses an inline controller, remote, app, voice assistant, or a compatible wall dimmer. Confirm that the controller supports the kit’s light type and functions. RGB, tunable-white, and addressable color effects may require different controllers; do not assume a standard dimmer will work.
Indoor or outdoor rating Look for the stated IP rating and the manufacturer’s permitted installation locations. IP20 is generally for dry indoor locations. IP44 provides protection against splashing water, and IP65 is dust-tight and protected against water jets under specified test conditions. Neither rating means the product is suitable for immersion; follow the product instructions.
Heat and mounting surface Check the recommended surface, ventilation requirements, and whether an aluminum channel or other mounting accessory is advised. Install on a clean, dry, suitable surface. Avoid covering components that need ventilation, and follow the manufacturer’s guidance for heat management and adhesive preparation.
Installation complexity Consider cable routing, outlet access, mounting method, corners, and whether the kit requires wiring or extra accessories. Choose a plug-in kit for a simpler setup when it meets your needs. Plan cable paths and measure the route before installation; use compatible corner pieces or connectors where required.
Electrical safety Check the power supply rating, instructions, and safety markings required for your location. Use the supplied or explicitly compatible power adapter. Keep indoor-only components out of wet areas, disconnect power before making connections, and consult a qualified electrician for fixed wiring.
Maintenance and support Review replacement-part availability, warranty terms, setup guidance, and the stated service conditions. Keep the instructions and product specifications. Before buying, verify that compatible controllers, adapters, and connectors are available if replacements or extensions may be needed.

Quick checklist: Match voltage and controller type, measure the installation area, select an appropriate indoor or outdoor rating, confirm the power supply can handle the total load, and follow the manufacturer’s installation and safety instructions.

Compare Total Cost, Warranty, and Long-Term Value

A low sticker price can hide costs that appear after installation. Compare the full kit price with mounting hardware, compatible dimmers, and any electrician’s fee. Then estimate energy use from the kit’s wattage and your expected hours of use. A simple calculation helps: watts divided by 1,000, multiplied by hours and your electricity rate. Your actual use may differ, so treat the result as an estimate, not a promise.

Read the warranty before comparing offers. Check how many years it covers, which parts are included, and whether labor or return shipping is excluded. A long warranty has limited value if the power supply is treated as a separate accessory. Keep the receipt and product details; warranty claims often depend on them. Small print matters.

Long-term value also depends on brightness, color consistency, and replaceable components. Look for clear lumen and color-temperature specifications, plus accessible replacement parts. A slightly higher upfront price may make sense if the kit uses less power and avoids early replacement. Still, predicted lifespans are not guarantees; installation conditions and daily use affect performance. I would compare cost per year, but admit that this figure can make uncertain assumptions look more precise than they are.

How to Choose the Best LED Light Kit in 2026?

Compare estimated five-year ownership cost, warranty length, and energy use.

Illustrative scenario, not a market survey: The three generic kit tiers use sample purchase prices of $35, $60, and $90; rated power of 10 W, 12 W, and 15 W; and warranties of 1, 3, and 5 years. Estimated electricity cost assumes 4 hours of use per day for five years and an electricity rate of $0.16/kWh. Actual costs and warranty coverage vary—use each kit’s published specifications and your local electricity rate. A longer warranty can add peace of mind, but does not guarantee lower running costs.


Close

Raise your Query

Hi! Simply click below and type your query.

Our experts will reply you very soon.

WhatsApp Us
