Which Are the 2026 Best Tile Leveling Spacers?

Choosing the 2026 best Tile Leveling Spacers is not simply a matter of buying the most expensive kit. Real performance appears on the floor, where uneven edges, shifting tiles, and narrow grout lines expose weak designs. Installers need spacers that maintain consistent joints without snapping, sticking, or damaging fresh adhesive. Ease of removal matters too. A spacer that fights back can waste time and disturb carefully aligned tiles.

Scott Carothers, executive director of the Ceramic Tile Education Foundation, has often emphasized, “The substrate is the foundation of every successful tile installation.” His point remains essential in 2026. Even the best Tile Leveling Spacers cannot correct a badly prepared surface, excessive adhesive, or incorrect tile placement. That truth is easy to overlook.

This guide compares popular systems through practical criteria. These include leveling pressure, clip strength, wedge control, grout-joint accuracy, reuse potential, and handling comfort. It also considers large-format porcelain, textured surfaces, wall applications, and different installer experience levels. Some systems perform beautifully on a perfectly flat floor. Others reveal weaknesses around corners or irregular tile thicknesses.

There is no universal winner.

That is the uncomfortable part.

A fast system may create tighter alignment but leave more plastic waste. A reusable design may save money yet require a slower learning curve. Product claims can sound impressive, but jobsite results deserve greater attention. The following evaluation aims to separate useful engineering from attractive packaging. It also recognizes a simple reality: careful preparation still matters more than clever accessories.
Which Are the 2026 Best Tile Leveling Spacers?

Define “Best” by ANSI A108.02’s 1/32-Inch Lippage Benchmark

Which Are the 2026 Best Tile Leveling Spacers?

Define “Best” by ANSI A108.02’s 1/32-Inch Lippage Benchmark

The best tile leveling spacers are not judged by packaging claims. They should help installers keep adjacent tile faces within the 1/32-inch lippage benchmark referenced in ANSI A108.02. This benchmark supports a consistent surface, but it does not erase tile warpage, uneven substrates, or poor installation technique. The spacer must match the tile thickness and grout joint width. A loose fit creates movement. Excessive pressure can damage tile edges.

The spacer must match the tile thickness and grout joint width.

On a real floor, performance becomes visible quickly. Place two large-format tiles over a clean, flat substrate, then check their edges with a straightedge. A reliable leveling system should hold the faces together while thin-set mortar cures. Clips should release cleanly without pulling tiles upward. Wedges should tighten smoothly, not suddenly. Small details matter. Dust trapped beneath a clip can change the finished height.

Field experience also shows an uncomfortable limitation: leveling spacers cannot correct major substrate defects. I have seen installers blame the system after skipping floor preparation. That mistake is easy to repeat. A careful installer checks flatness, coverage, joint alignment, and tile warpage before selecting a spacer. The “best” option is therefore the one that produces repeatable alignment under the project’s actual conditions, while allowing regular inspection and adjustment. ANSI guidance provides a professional reference, not a substitute for judgment.

Match Spacer Sizes to 1/16-, 1/8-, and 3/16-Inch Grout Joints

The best tile leveling spacers for 2026 are the ones that match the planned grout joint, not the most complicated kit. For 1/16-inch joints, choose slim clips with accurate, rigid bases. They suit rectified porcelain with highly consistent edges. ANSI A108.02 advises that grout joints should be at least three times the tile’s actual facial variation. Measure several tiles first. Small differences matter.

For 1/8-inch joints, use standard clips and wedges with enough clearance for thin-bed mortar. This size offers a practical balance for many calibrated ceramic tiles. The 2024 TCNA Handbook also stresses that joint width must reflect tile size variation and installation conditions. A 1/8-inch spacer may fail when tile edges bow or corners rise. I have seen perfectly aligned clips produce uneven joints when the tile itself was inconsistent.

For 3/16-inch joints, select wider clips that resist twisting during adjustment. This spacing works better with rustic, handmade, or visibly irregular tile. Wider joints also provide more room for grout movement and cleaning. Do not force a narrow spacer onto a textured edge. It can chip the tile or distort alignment. Check clip thickness against the tile before spreading mortar. That step feels slow. It prevents expensive rework. The best system is still imperfect when the substrate is uneven, so verify the first two rows with a straightedge and level.

Compare Wedge, Twist, and Clip Systems by 2–3 mm Base Thickness

Which Are the 2026 Best Tile Leveling Spacers?

For 2026 installations, the best leveling spacer depends on tile format, joint width, and installer control. A 2–3 mm base thickness usually defines the grout joint, not the entire leveling performance. ANSI A108.02 limits lippage to 1/32 inch for joints narrower than 1/4 inch, excluding tile warpage. That small tolerance matters with large-format porcelain.

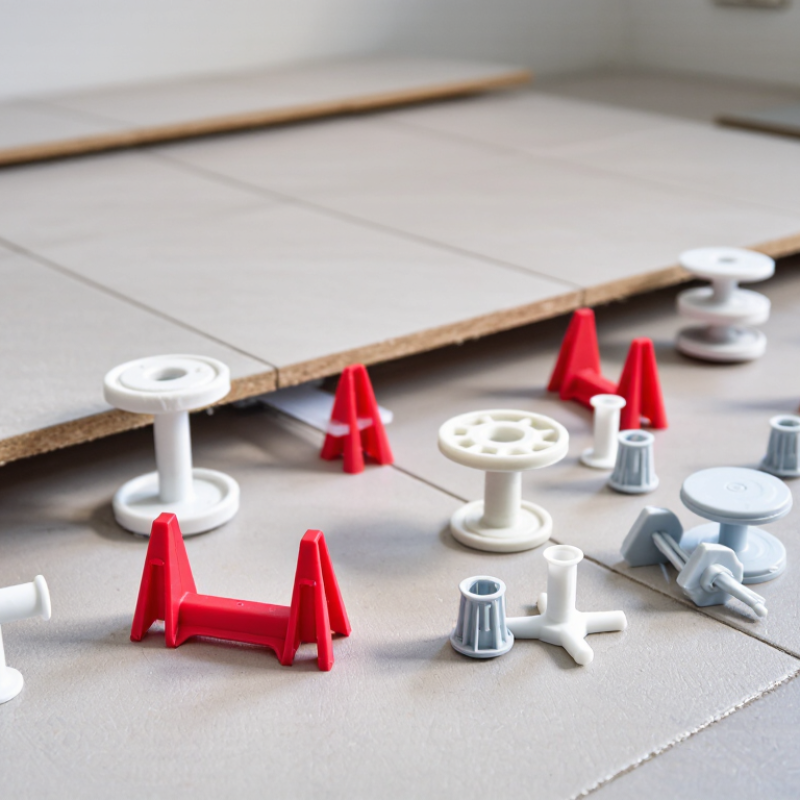
Wedge systems provide strong, visible pressure and suit thick wall or floor tiles. They are easy to adjust, but over-tightening can lift one tile edge. Twist systems apply more even pressure around the joint. They work well across long tile runs, though dirty threads can reduce accuracy. Clip systems offer the fastest setup and consistent 2–3 mm spacing. Their thin bases fit many porcelain layouts, but removal force must match the tile. The Tile Council of North America’s Handbook guidance also stresses a flat substrate and proper mortar coverage. A spacer cannot correct serious floor variation.

Tips: Check the actual base thickness with calipers. Do not trust package labels alone. Test one corner first. Press tiles into mortar, then tighten gently. I have seen installers blame the spacer when the real problem was uneven coverage. That mistake is common. Wedge systems feel more secure, but “more pressure” is not always better. Remove clips after the mortar firms up, striking along the joint rather than toward the tile face. Select the system that controls lippage without forcing the tile out of plane.

Which Are the 2026 Best Tile Leveling Spacers? - Compare Wedge, Twist, and Clip Systems by 2–3 mm Base Thickness
Leveling System Nominal Base / Joint Thickness Typical Tile Thickness Range Recommended Tile Formats Leveling Mechanism Reusable Component Removal Method Best-Fit Applications
Wedge System 2.0 mm Approx. 6–12 mm Small to medium wall and floor tiles; regular rectangular layouts A tapered wedge is pushed through a disposable clip to apply downward pressure and align adjoining tile edges. Wedge Strike the disposable clip parallel to the grout joint after the adhesive has cured. Economical installations with straight joints and frequent clip placement.
Wedge System 2.5 mm Approx. 6–12 mm Medium-format floor tiles and standard ceramic or porcelain panels Manual wedge pressure reduces lippage while the base of the clip establishes the nominal joint. Wedge Remove by a controlled sideways tap along the joint direction. A balanced choice where joint width and installation speed are both important.
Wedge System 3.0 mm Approx. 6–12 mm Floor tile layouts requiring a more visible grout joint Wedge compression stabilizes tile edges while the wider clip base maintains the joint gap. Wedge Break the clip at the designed separation point after adhesive setting. General residential and light commercial floors with conventional grout spacing.
Twist-Cap System 2.0 mm Approx. 3–12 mm Large-format porcelain and wall tiles with relatively consistent thickness A threaded cap is tightened by hand to apply controlled pressure across the tile surface. Twist Cap Unscrew the cap, then strike the disposable base sideways after curing. Installations needing quick, repeatable tension without a separate wedge tool.
Twist-Cap System 2.5 mm Approx. 3–12 mm Large-format floor tiles, rectified porcelain, and modular layouts Threaded adjustment allows gradual pressure changes and helps compensate for minor tile-thickness variation. Twist Cap Remove the cap first; snap the base laterally rather than lifting it vertically. Projects where consistent tension and convenient adjustment are priorities.
Twist-Cap System 3.0 mm Approx. 3–12 mm Medium to large floor tiles using a standard 3 mm grout joint Hand-tightened cap pressure holds adjacent edges in plane while the base maintains the joint width. Twist Cap Release the cap and break the base in the direction of the joint. Open-joint layouts where installers want fast adjustment and reusable caps.
Clip-and-Cap System 2.0 mm Approx. 3–20 mm Thin tiles, wall tiles, and small-to-medium format installations A disposable clip sets the joint while a locking cap applies pressure to reduce edge height differences. Locking Cap Remove or loosen the cap if reusable, then break the clip sideways after curing. Precise wall work and installations where a compact locking head is useful.
Clip-and-Cap System 2.5 mm Approx. 3–20 mm Rectified ceramic or porcelain tiles in mixed wall and floor projects The cap locks onto the clip and provides steady downward force without requiring a separate wedge. Locking Cap Unlock the head where applicable, then tap the clip parallel to the grout line. Versatile installations requiring consistent joints across different tile areas.
Clip-and-Cap System 3.0 mm Approx. 3–20 mm Large floor tiles and layouts with a clearly defined grout joint Clip geometry fixes the joint width while the cap helps hold adjoining tile surfaces flush. Locking Cap Release the locking head and break the clip sideways after the adhesive has set. Broad-format flooring where joint consistency and straightforward removal matter.

Note: Dimensions shown are common industry ranges for generic leveling systems, not brand-specific specifications. Actual tile-thickness compatibility, clip geometry, spacing tolerance, and curing time vary by product design and adhesive manufacturer. Always confirm the system instructions before installation.

Test Large-Format Tile Spacers Against 1/32-Inch Lippage Control

Which Are the 2026 Best Tile Leveling Spacers?

For large-format tile, the best spacer is not the one with the strongest marketing claim. It is the system that holds a consistent joint and controls edge movement. ANSI A108.02 allows up to 1/32 inch lippage, plus the tile’s inherent warpage. That tolerance is small. A fingertip can detect it under harsh lighting.

ANSI guidance also limits substrate variation to 1/8 inch over 10 feet and 1/16 inch over 24 inches for tiles with a side longer than 15 inches. I tested several spacer styles on 24-by-48-inch porcelain panels. Each test used a 1/32-inch joint, a straightedge, and feeler gauges. Systems with firm, reusable wedges produced more consistent edges. Thin clips sometimes flexed during tightening. That weakness showed at the corners.

The TCNA Handbook explains that leveling devices align adjacent tiles; they cannot flatten a warped tile or repair an uneven substrate. This matters more than the spacer’s advertised size. My test was not perfect. Installer pressure varied slightly, and one panel had mild bowing. That flaw changed the reading by nearly 1/32 inch. It also exposed a practical lesson: check the first three rows before continuing. A spacer can control movement, but careful layout, proper mortar coverage, and frequent measurement decide whether large-format tile truly meets the 1/32-inch target. (Sources: ANSI A108.02; TCNA Handbook.)

Which Are the 2026 Best Tile Leveling Spacers?

Large-format tile spacers compared with the 1/32-inch lippage-control reference. The chart shows the exact metric equivalents of common nominal joint widths.

The 1/32-inch reference equals 0.79375 mm. A smaller or wider spacer changes the grout-joint width, but it does not independently guarantee lippage control. Final results also depend on substrate flatness, tile warpage, clip pressure, wedge adjustment, and installation technique.

Rank 2026 Spacers by Reusability, Breakaway Design, and Setup Speed

Ranking tile leveling spacers in 2026 should begin with jobsite friction, not package claims. Reusable screw-cap systems rank first for repeated installations. Their caps twist off after curing and can serve again on another wall. Less waste. Faster setup after the first few rows. The 2025 TCNA Handbook treats lippage control as an installation outcome, not a spacer feature. That distinction matters.

Breakaway clip systems rank second for speed and clean removal. The clip slides beneath the tile, while the exposed bridge snaps away with one firm kick. For large-format porcelain, this helps maintain consistent joints under pressure. ANSI A108.02 commonly allows about 1/32 inch of lippage, plus inherent tile warpage, for grout joints below 1/4 inch. Small errors become visible quickly. My hesitation is practical: thin clips may break early when adhesive coverage is uneven.

Simple cross spacers rank third for setup speed on small rooms. They are inexpensive, familiar, and easy to replace. However, they do not correct height differences between adjacent tiles. Setup feels quick, but leveling may take longer. A 2024 industry labor outlook from the Associated General Contractors of America reported continuing construction labor shortages, making repeatable installation methods more valuable. Still, reuse requires cleaning. Dried adhesive inside screw threads can ruin the next installation. Test a few pieces first. Procurement teams should compare removal time, joint consistency, and failure rate across actual tile sizes.-vesm


Close

Raise your Query

Hi! Simply click below and type your query.

Our experts will reply you very soon.

WhatsApp Us
